Use this article to learn how to share your list views with other Xyicon users and groups, and how to mark an existing view as Favorite.
Switch to V5 to access this functionality.
Before You Begin
Ensure you have already created views.
Make sure the users and user groups you want to share your view with exist in Xyicon. Users and User Groups are managed by your organization's Xyicon Administrator.
Ensure you have the necessary permissions to share views. Permissions are managed by your organization’s Xyicon Administrator.
Sharing a View
Option 1: Share a View with Users and User Groups
From the Workspace Navigation Panel, click on the Views button.
Go to the desired view that you want to share. Click on the More (
 ) icon next to the view and click Share.
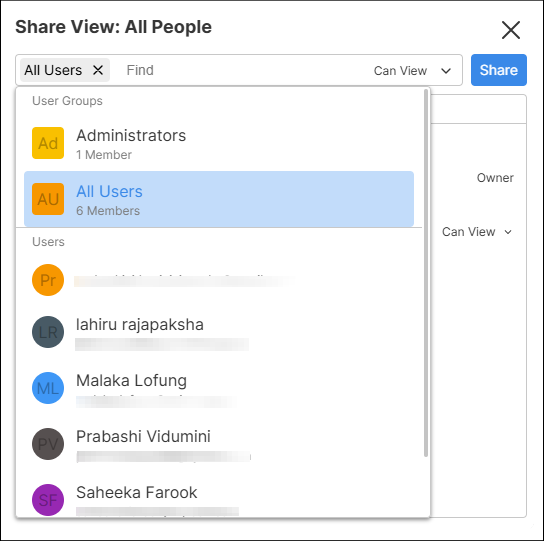
 On the Share View modal, search and select the relevant Users or User Groups.
Select the necessary permission level from the dropdown next to the search.
Can Edit
Can View
Click Share to apply.
TIP: You can share any view that you own or have edit permissions for.
Option 2: Share a View with the Whole Organization - Global Sharing
From the Navigation Panel, click on the Views icon.
Go to the desired view that you want to share. Click on the More (
) icon next to the view.Select Mark as Global View and click Confirm in the pop-up to apply. Only Xyicon Administrators who are owners or Xyicon Administrators with edit permissions on a shared view can mark the view as global.
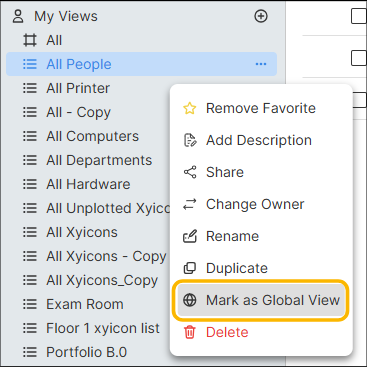
NOTE: Once a view is marked as a Global View, it will be shared with all users in the Xyicon Organization.
Stop Sharing or Change Permission
From the Navigation Panel, click on the Views icon.
Select a view that is shared with a User or a User Group. Click on the More (
) icon next to the view and click Share. On the Share View modal, it shows the Users and User Groups who have access to the view.
To stop sharing: Select the relevant User or the User Group, and click the Unshare button. Click Delete on the pop-up.
To change permission: Click the permission level the user or user group currently has, then select the relevant permission level from the dropdown.
Marking a View as Favorite
From the Navigation Panel, click on the Views icon.
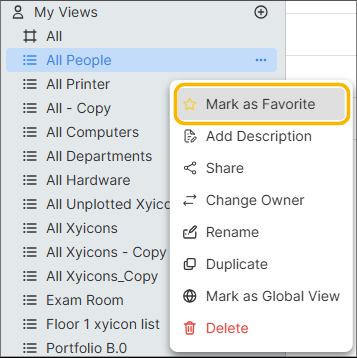
Go to the desired view that you want to share. Click on the More (
) icon next to the view.Click Mark as Favorite to add the view to the Favorites section.
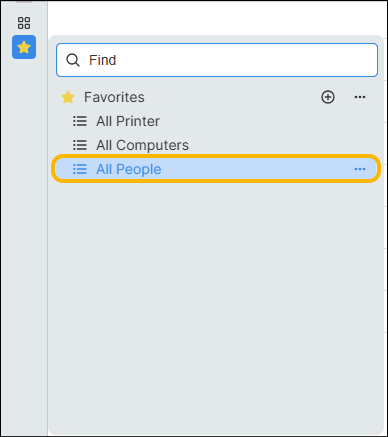
After you add a view to your Favorites, it is listed under Favorites along with all the other views, and also separately in the Favorites section on the Navigation Bar.
To remove a favorite, click the More icon (
) next to the view and select Remove Favorite.
Before You Begin
Make sure that the users and user groups with whom you want to share your view exist in Xyicon. Users and User Groups are managed by your organization's Xyicon Administrator.
Your Xyicon User has the necessary permissions to share views for the PORTFOLIOS, SPACES, CATALOG, XYICONS, BOUNDARIES modules, and the Space Editor. The table below describes the available permission levels for a Xyicon view.
| Permission Level | Description | List of Permissions |
|---|---|---|
| Owner ( ) | This is the default permission level assigned to your user when you create a view. You can also receive this permission level if another user changes their view ownership to you. This permission level is only applicable to users. Any user designated as the owner can perform all actions related to views. |
|
| Can Edit ( ) | This is the default permission level assigned to you when you change your view ownership to another user. You can assign this permission level to both users and user groups. |
|
| Can View ( ) | This is the default permission level assigned to all users and groups when a view is shared. |
|
Share View with Users and User Groups
Navigate to the Space Editor or open the desired module from the Main Menu.
Click the View Selector fields on the Views Bar of the Space Editor or module window. A dropdown will appear with a list of existing views (if any).
Hover over the view you want to share, click the More Options button, and click Share. The Share View panel will open.
Click the search box and start typing the person’s name or user group with whom you want to share this view.
Next, hover over the user or group in the dropdown list and click Share or click anywhere on the highlighted user/ user group. Repeat as required.
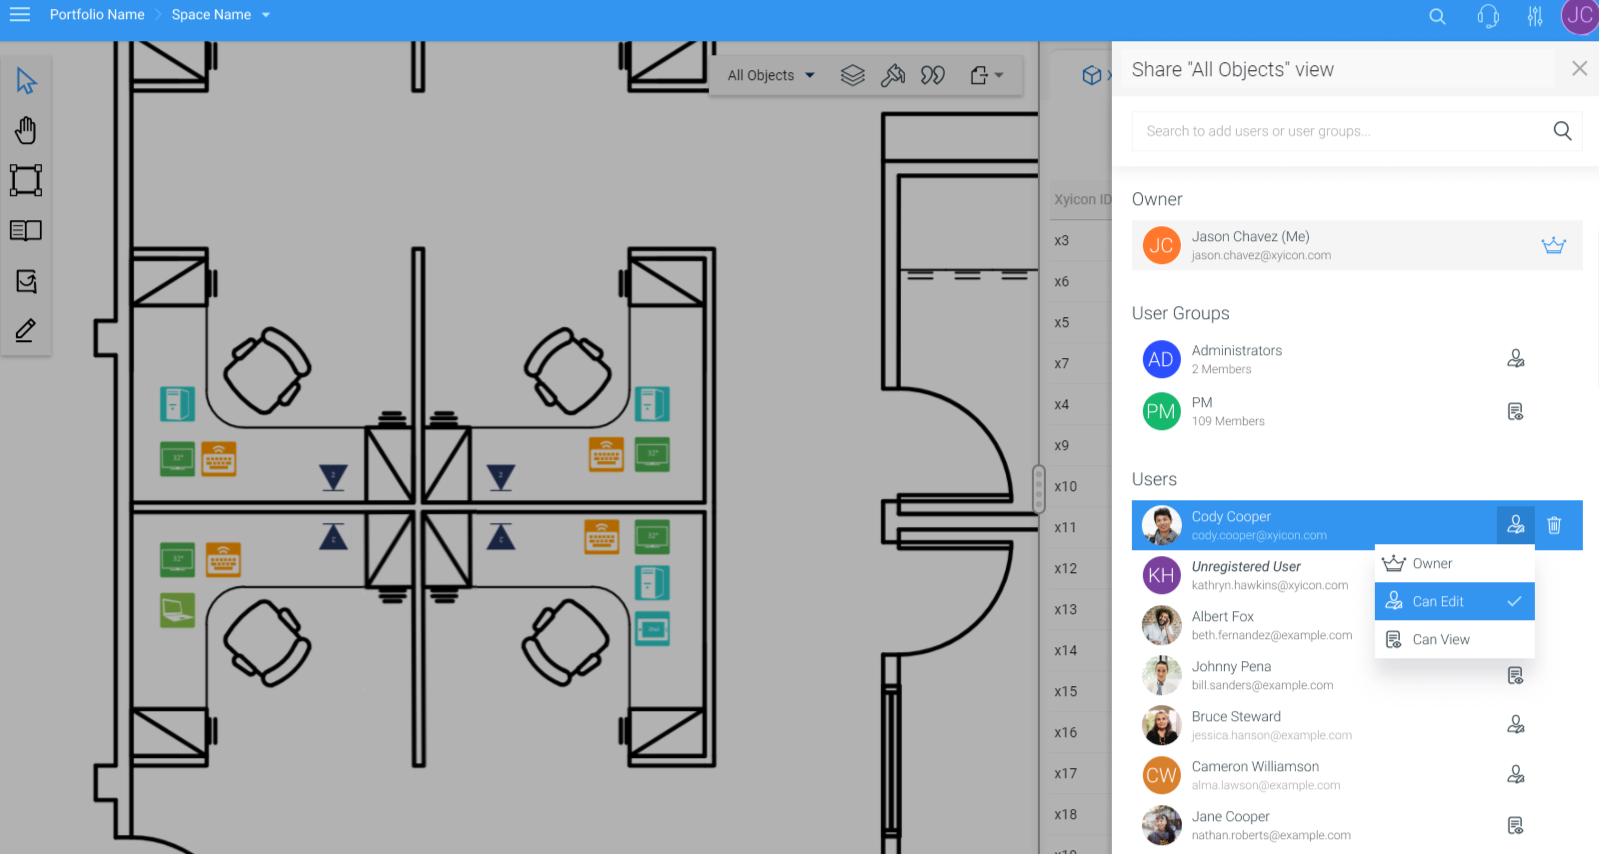
Finally, assign a permission level to each user and group in the list by clicking on the dropdown of the following Permission Level icon.
Owner - Only applicable to users.
Can Edit
Can View
To exit the Share View panel, click Close.
Stop or Change Sharing
Navigate to the Space Editor or open the desired module from the Main Menu.
Click the View Selector fileds on the Views Bar of the Space Editor or module window. A dropdown will appear with a list of existing views (if any).
Hover over the view for which you want to change sharing, click the More Options button and click Share. The Share View panel will open.
To stop sharing the view with a user or a user group, hover over the user or user group name and click Remove.
To change permissions, click the Permission Level icon next to the user or user group (which indicates the current assigned permission level) next to the user or user group, then in the dropdown that opens select the permission level you wish to assign to that user or user group.
Can Edit
Can View
To exit the Share View panel, click Close.