Xyicon Users
Use this article to learn how to apply and save filters to a view in the PORTFOLIOS, SPACES, CATALOG, XYICONS, and BOUNDARIES module windows and the Xyicons tab ( ) and Boundaries tab ( ) in the Space Editor. To learn more about building filters read the Using Filters help article.
Before you begin
Make sure that
- For shared views, your Xyicon User has the necessary permissions to update the view. Permissions for shared views are set by the view's owner. If you do not have permission to edit the active view, you can save the changes as a new view.
- Your objects in the module and Space Editor have values for their respective fields. A field must contain a value for it to be visible on the Filter tab ( ).
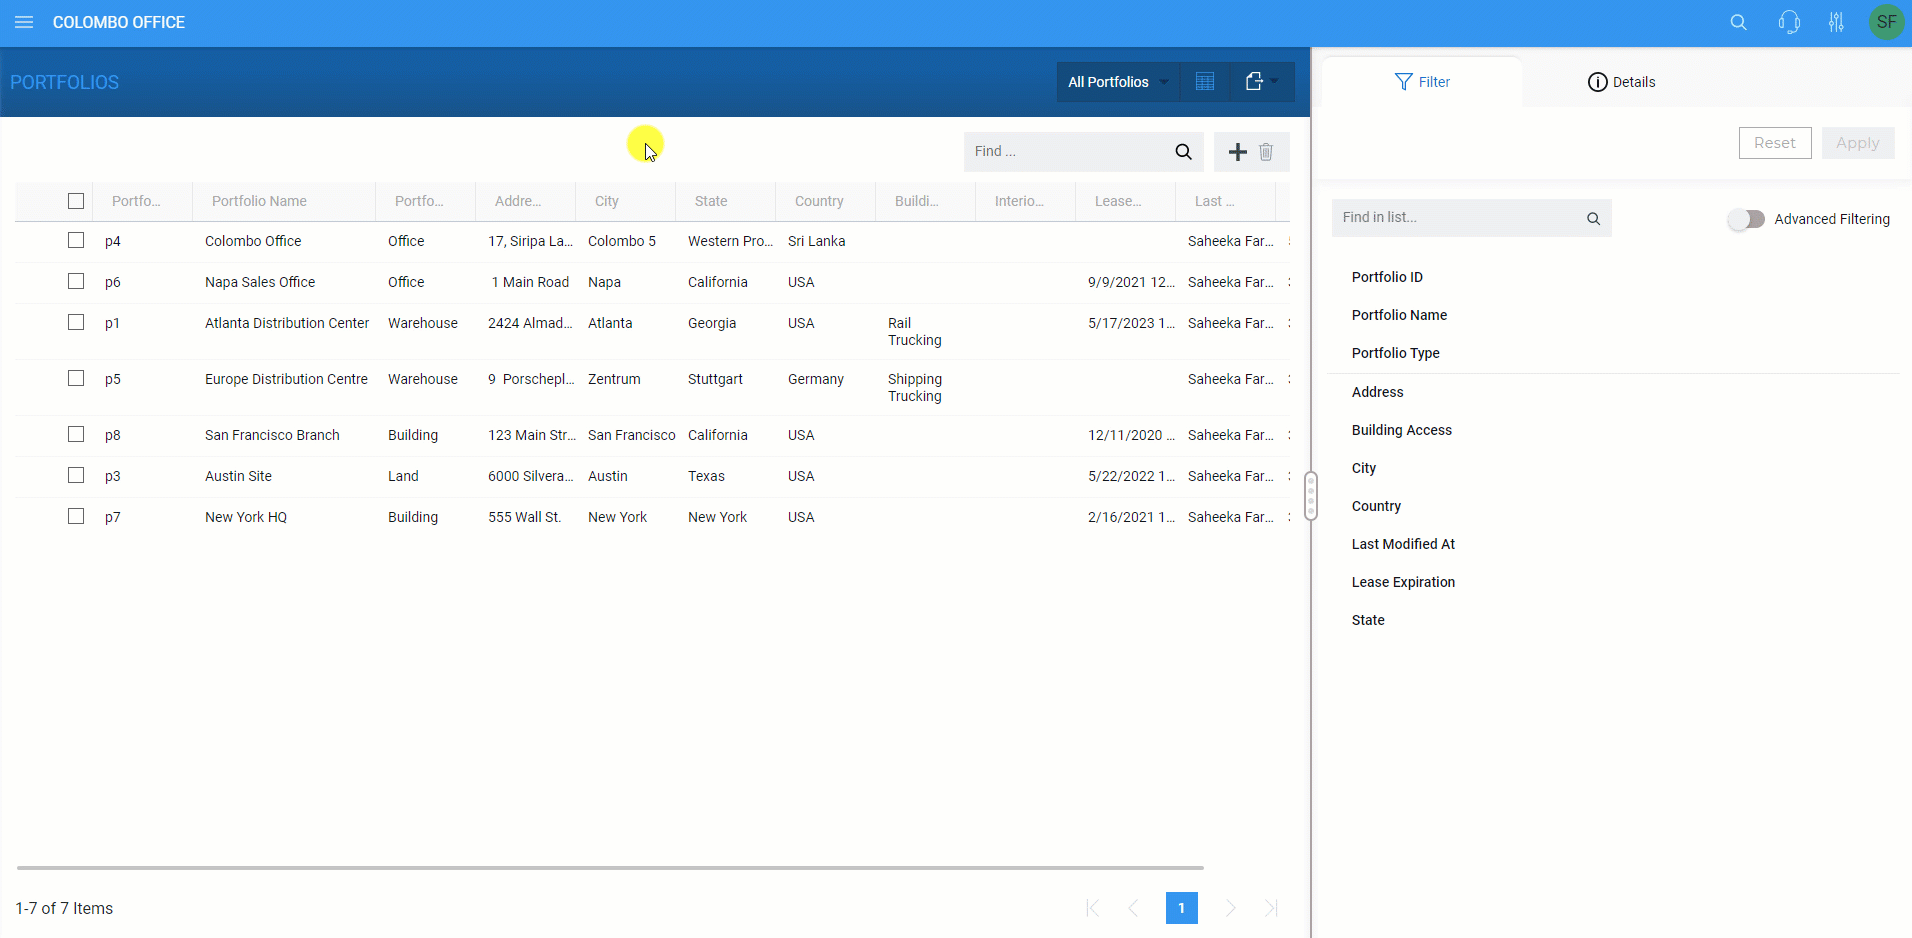
Apply Basic Filters
- Click the Main Menu ( ) and click a module or open the Space Editor.
- Select the view to which you want to apply the filter from the View Selector.
- Next, click the Side Panel > Filter tab ( ) and click a field by which you want to filter the available objects. The field will expand to display a list of values available for filtering.TIP: Only fields with at least one value are displayed on the tab.
- Select one or more values.
- Click Apply.
- To save the filter to the active view, click the Save to View button ( ) located on the tab. Alternatively, you can save the filter as a separate view by clicking Save as New View.
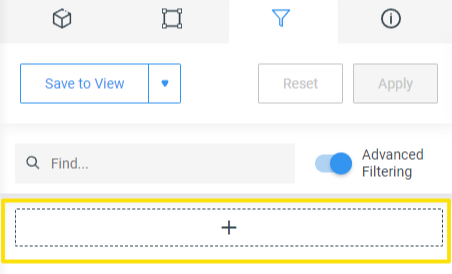
Apply Advanced Filters
- On the Side Panel > Filter tab ( ) for the view, switch on the Advanced Filtering toggle button.
- Click on the (+) button.
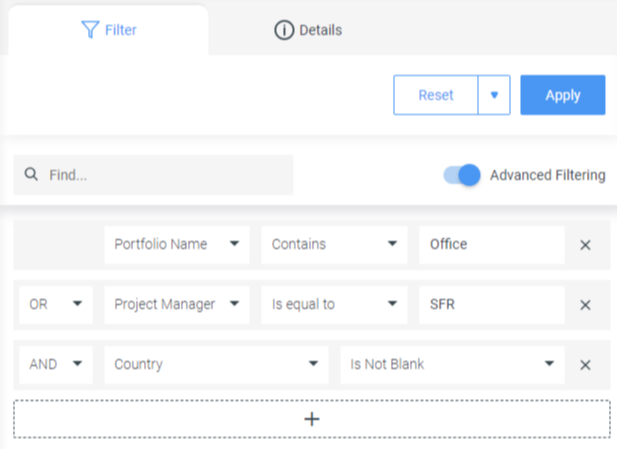
- Select a field and the criteria you would like to apply. Xyicon's advanced filtering feature supports both logical and comparison operators to build complex queries.
- Continue building the filter criteria according to your requirement.
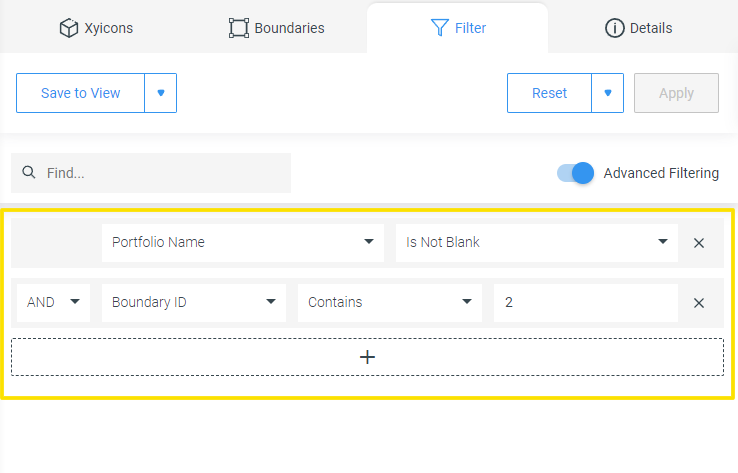
- Click Apply.
- To save the filter to the active view, click the Save to View button ( ). Alternatively, you can save the filter as a separate view by clicking Save as New View.
How to Reset and Clear Filters
The reset and clear filter functions provide a way to undo and remove filters from views quickly.
Reset Filters
Resetting a filter reverts any unsaved changes you made to the active view's filter and restores the view to its original state.
- To reset the current view's filter, click the Reset button on the Side Panel > Filter tab ( ) or select the Reset Filters button available on the view.

Clear Filters
Clearing a filter removes all saved and unsaved filters from the view.
- To clear individual filters on a view, use the options below
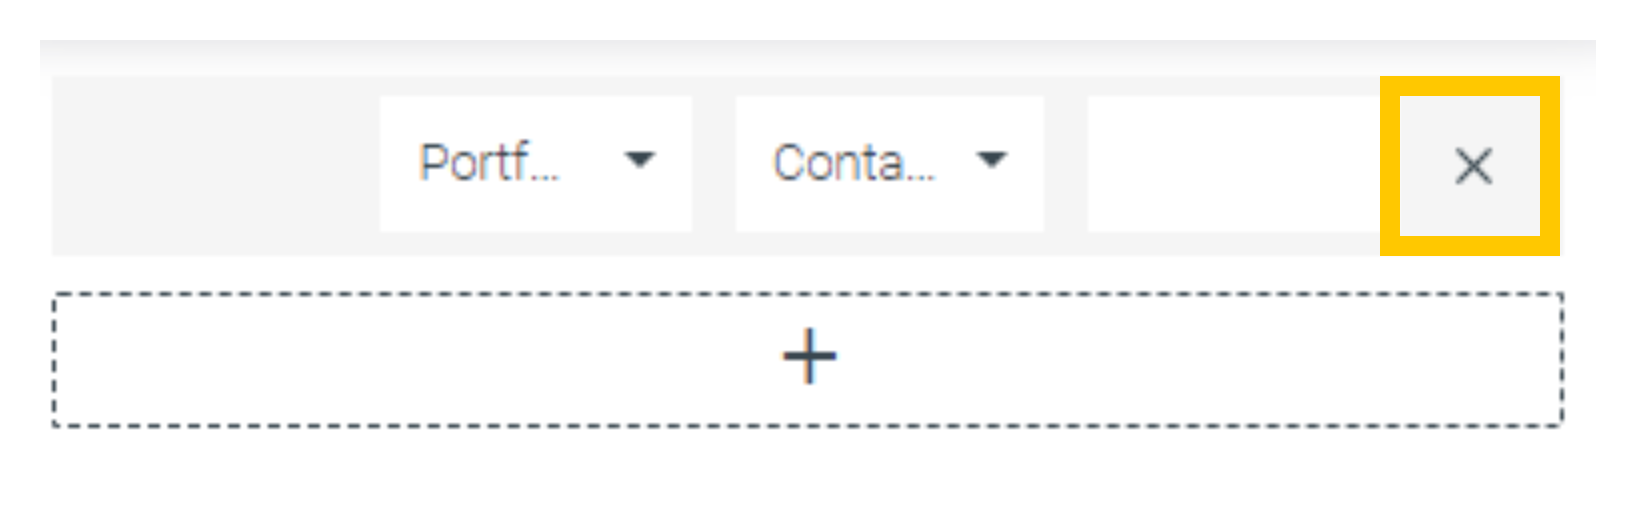
- Basic Filter - Click the Remove button ( ) against the respective fields.
- Advanced Filter - Click the Remove button against the respective filter condition.
- To clear all filters, click the dropdown arrow ( ) on the Reset button and click Clear All.
- Finally, click the Save to View button ( ) to save the changes to the active view. Alternatively, you can save the changes as a separate view by clicking Save as New View.