Xyicon Users
Use this article to learn how to merge two or more boundaries. The boundaries can be contiguous or non-contiguous and located across spaces but must belong to the same portfolio.
Before you begin
- Make sure that your Xyicon User has the necessary permissions to view and update boundaries. User Permissions are managed by your organization's Xyicon Administrator.
- The boundaries you want to merge must belong to the same portfolio.
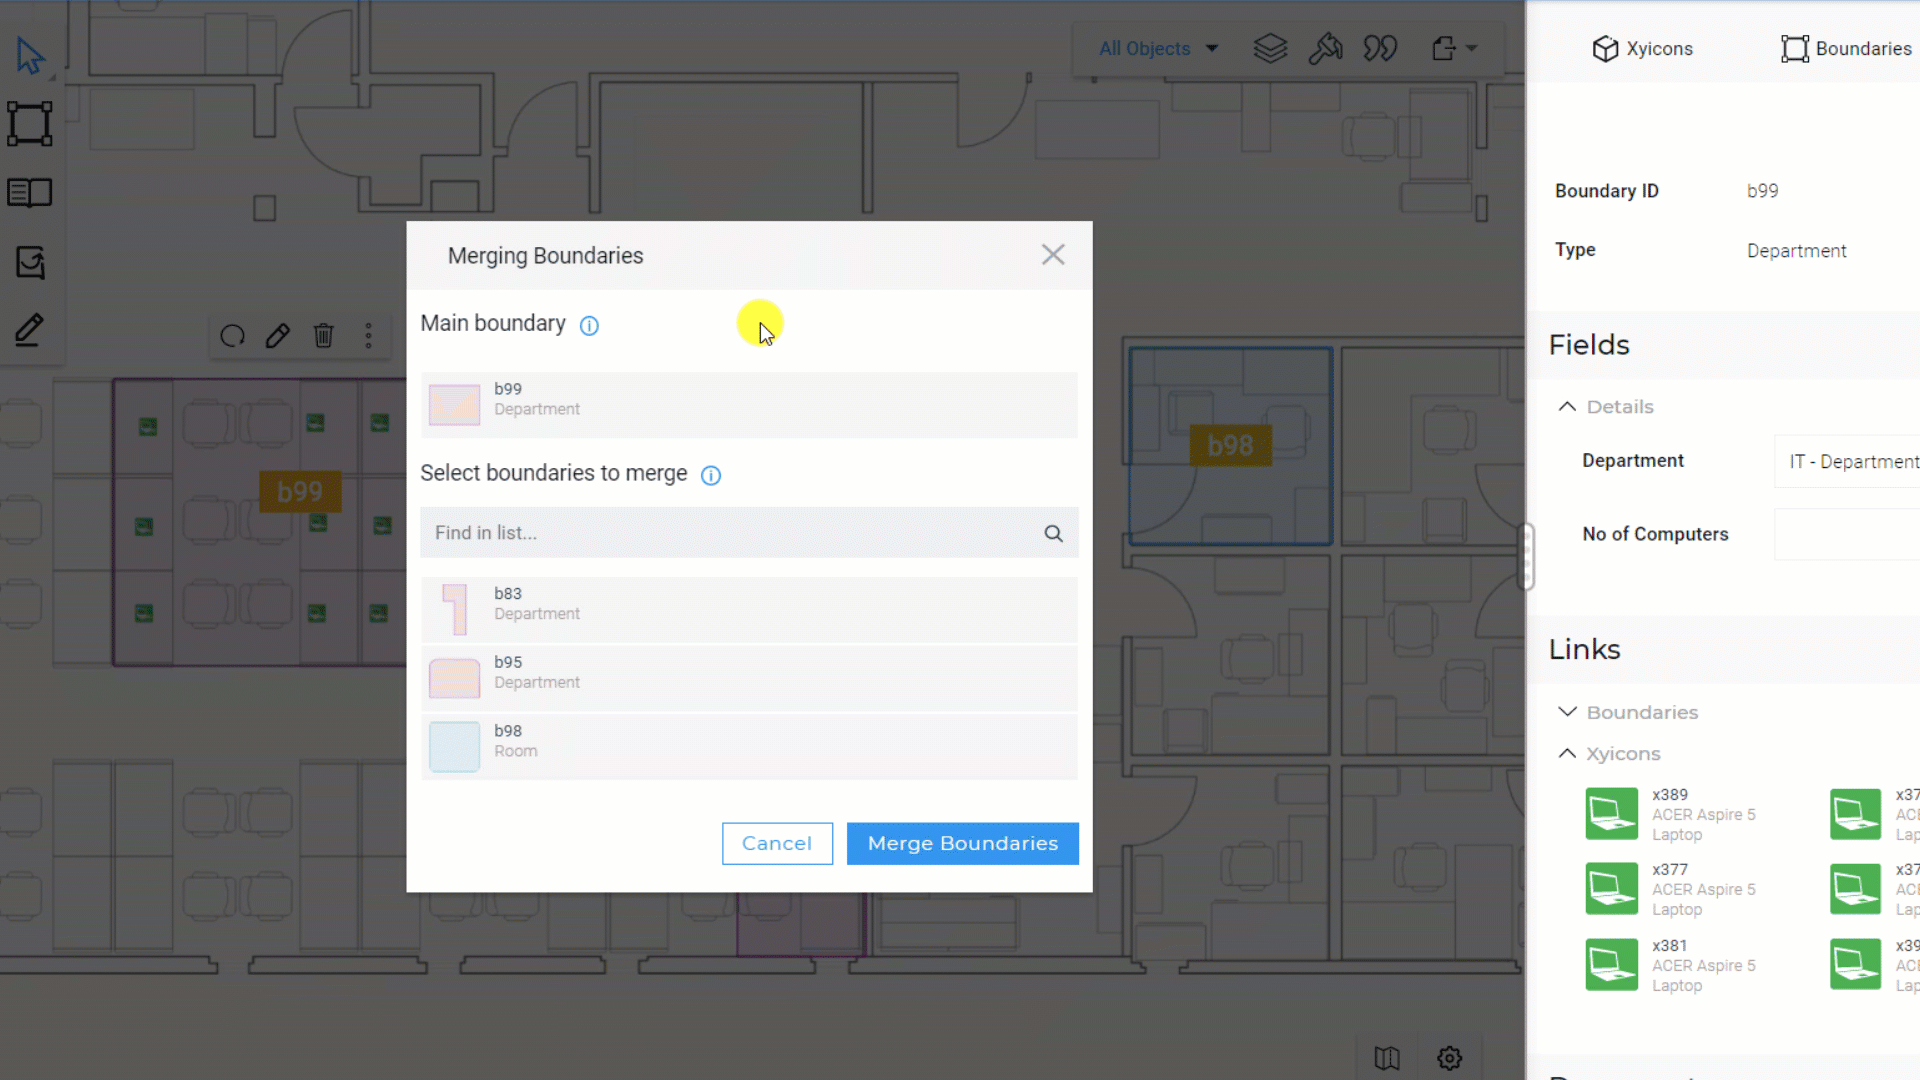
Step 1 - Select the Main Boundary
The Main Boundary is the boundary to which you want all subsequent boundaries merged.
- Navigate to the Space Editor.
- Select your main boundary on the space.
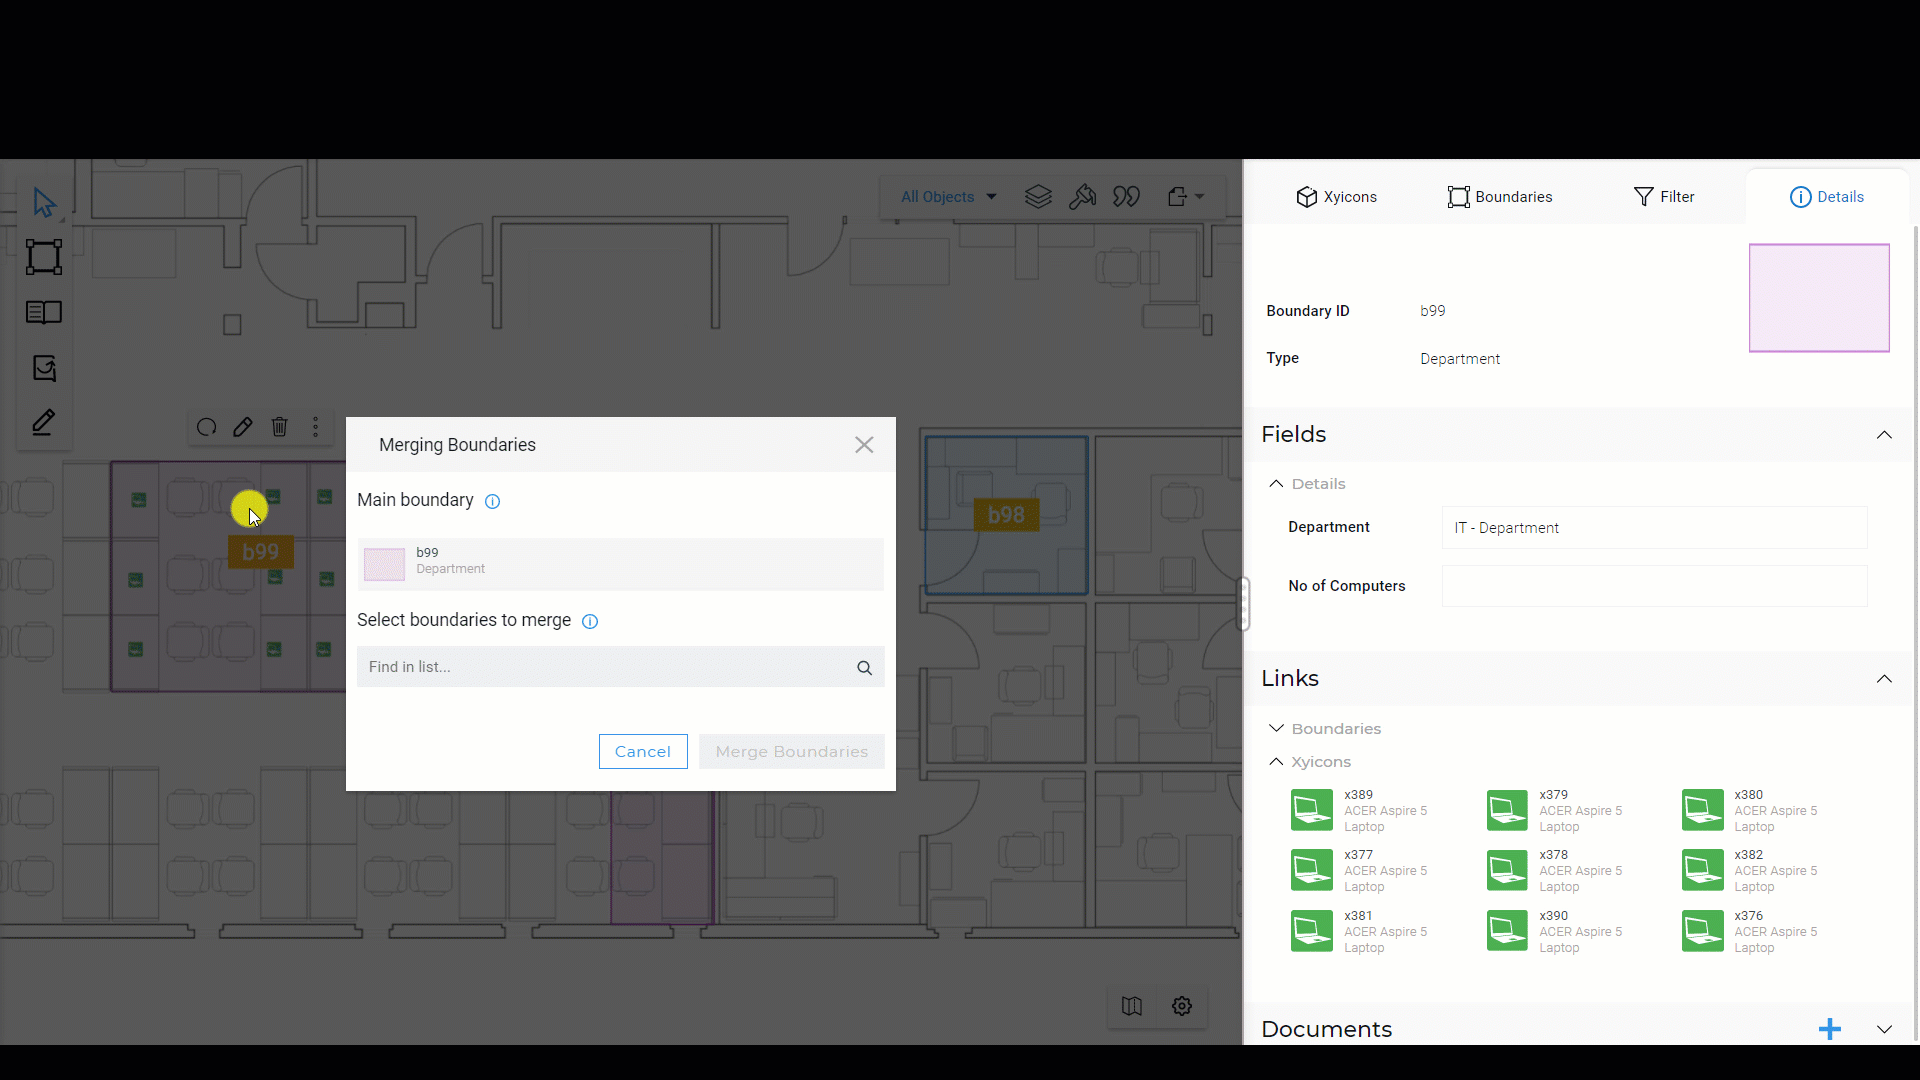
- Click the More Options button ( ) on the Action Bar and click Merge (). The Merging Boundaries dialog will appear, and you will find the boundary you selected listed under the Main Boundary section.
- If you selected multiple boundaries, the first boundary you clicked on is set as the main boundary.
Step 2 - Select Boundaries to Merge to Main Boundary
Add boundaries to the Boundary Merge List
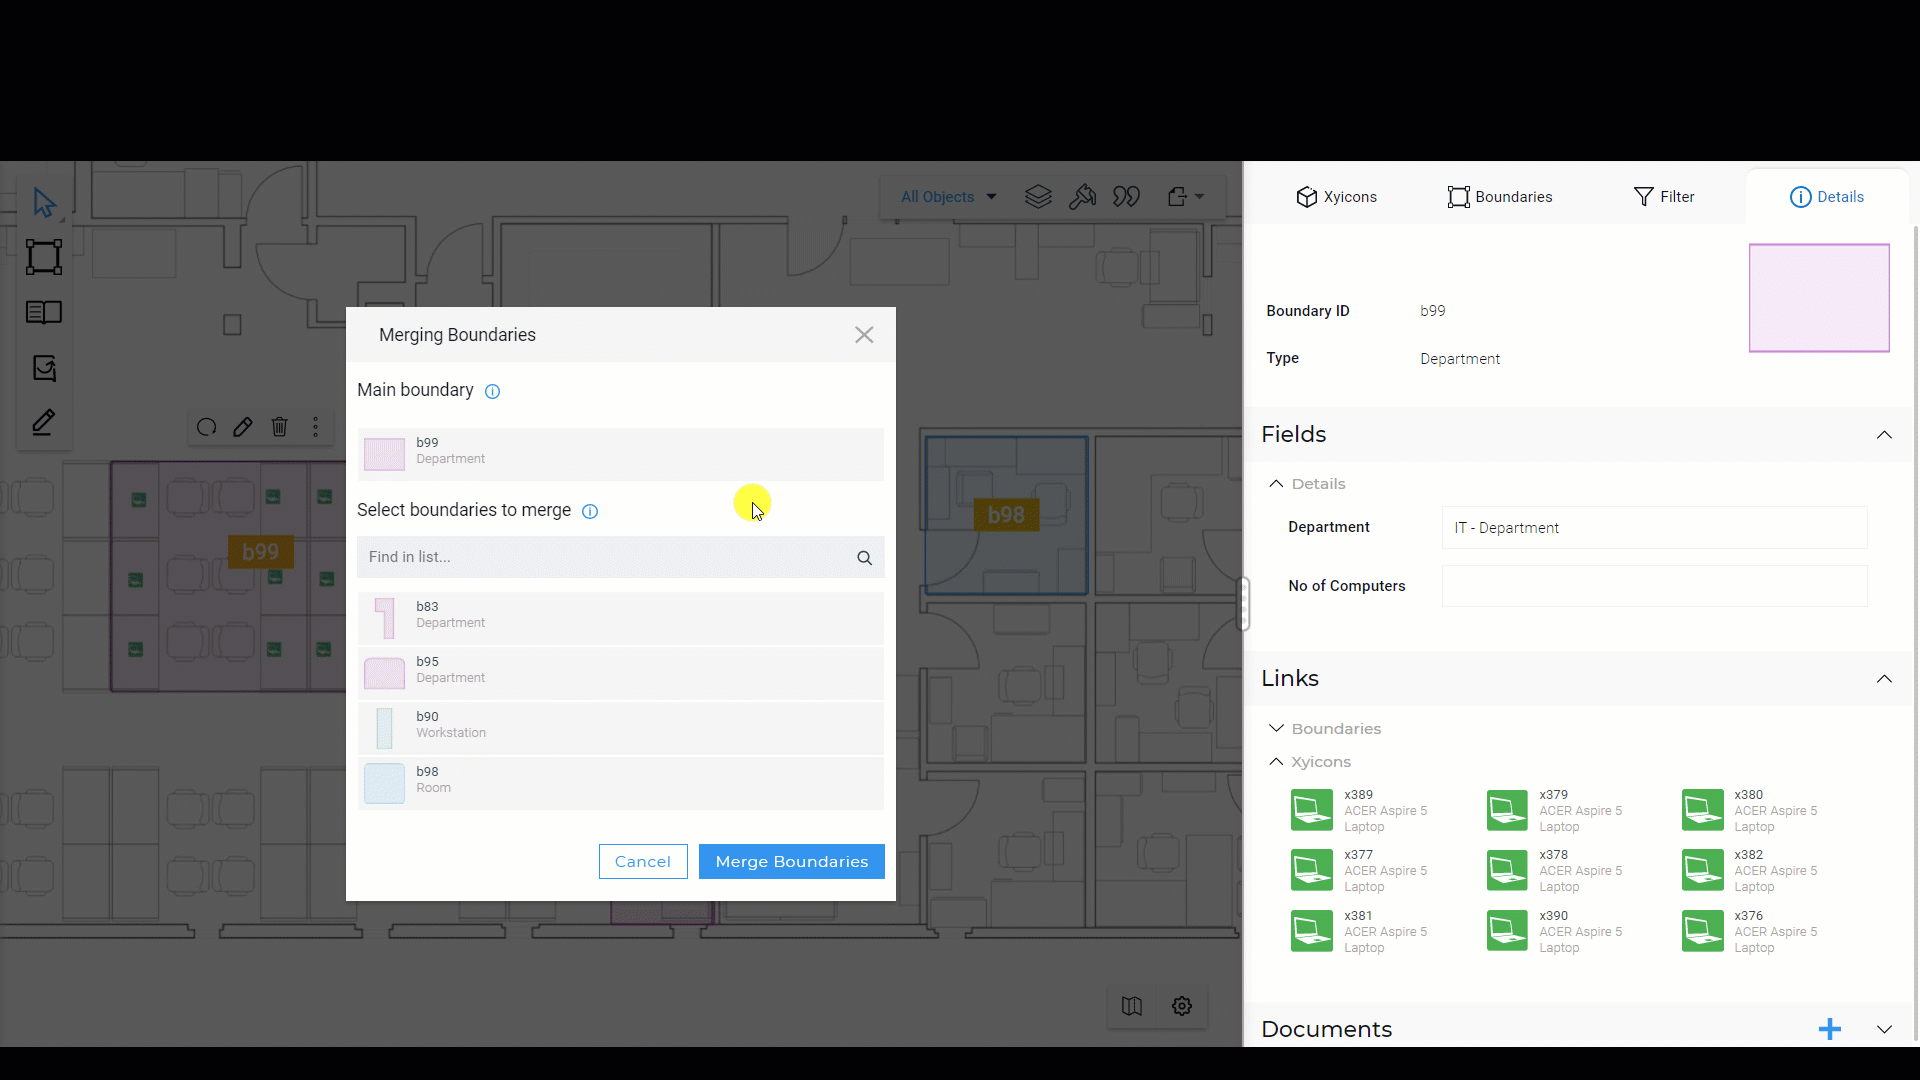
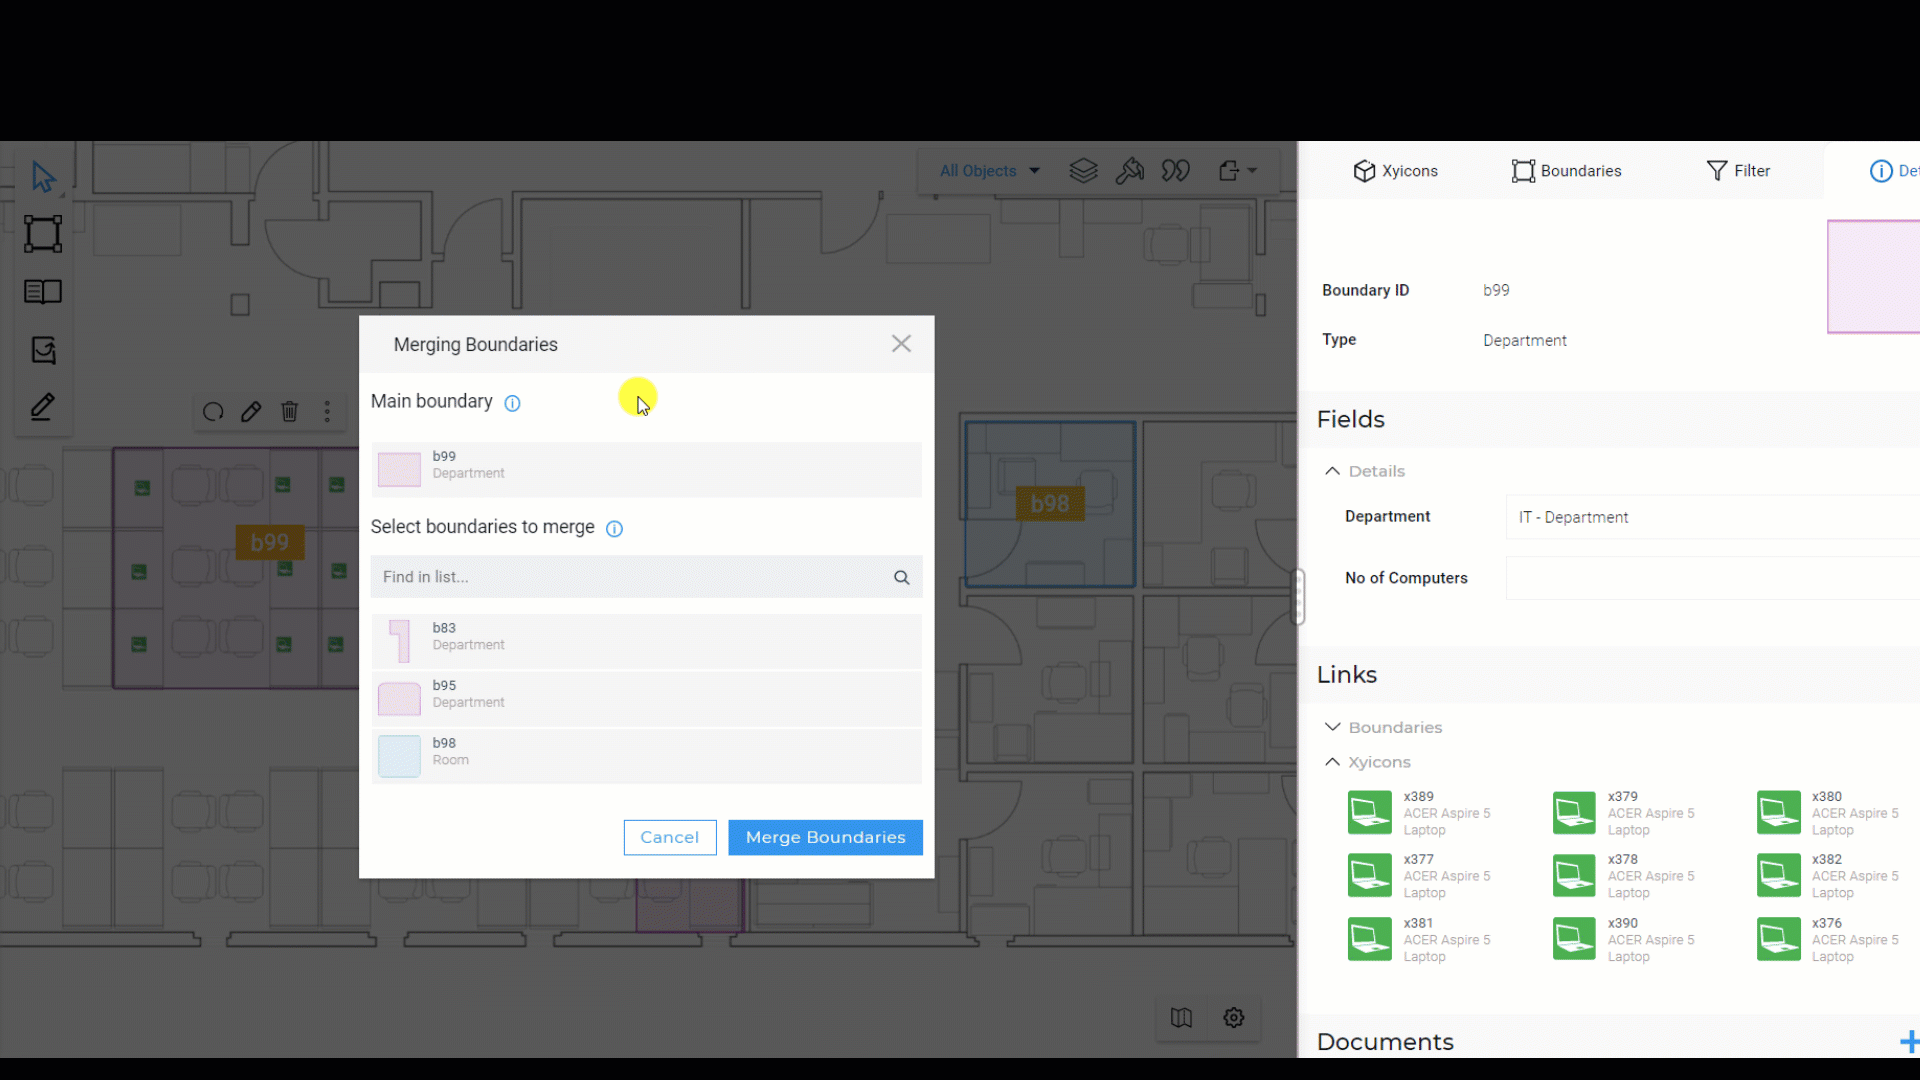
- Select the main boundary.
- Search for the boundaries you want to add using the search field under the Search boundaries to merge section. Xyiconwill list the boundaries that meet the search criteria in a dropdown list.TIP: The boundaries that belong to the same space are displayed at the top of the list. Scroll down the list to see the boundaries that belong to the rest of the portfolio.
- Hover over the boundary you want to add and click the Add button. Repeat as desired.
- Click anywhere on the dialog to complete adding boundaries to the Boundary Merge List.
Remove boundaries from the Boundary Merge List
- Hover over the boundary you want to remove from the list and click the Remove button ( ).
- Repeat as needed.
Step 3 - Swapping the Main Boundary
Sometimes you may need to swap out the main boundary with another from the Boundary Merge List. You can do this by using one of the methods below.
Method 1 - Promote a boundary to Main Boundary
- Go to the Select boundaries to merge section of the Merge Boundaries dialog.
- Hover over the boundary you want to promote and click the Promote button ( ).
- The selected boundary replaces the main boundary, and the previous main boundary is demoted and added to the Select boundaries to merge section.
Method 2 - Demote the Main Boundary
- Hover over the main boundary and click the Demote button ( ).
- The first boundary in the merge list is set as the current main boundary. The previous main boundary is demoted and added to the Select boundaries to merge section.
Step 4 - Merge Boundaries
- When you are ready to merge your selected boundaries, click the Merge Boundaries button on the dialog. You will receive an alert when the boundaries are successfully merged.

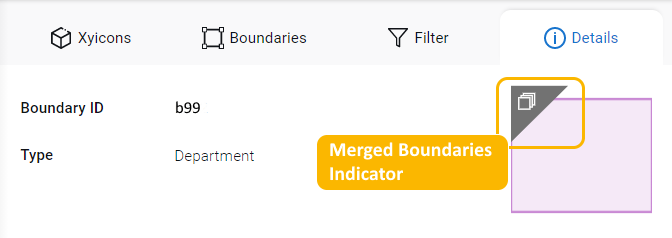
- On the Side Panel > Details tab ( ), click the Merged Boundaries Indicator ( ) for a selected boundary to see a list of all merged boundaries. All boundaries in the list will have the same ID, type, and field information.