Use this article to learn how to create a view.
Before you begin
Make sure that your Xyicon User has the necessary permissions to create views. User Permissions are managed by your organization's Xyicon Administrator.
Steps
Switch to V5 to access this functionality.
Click the Create (
 ) button on the Workspace Navigation Panel, or
click on the Views button from the Workspace Navigation Panel. Click the Create () button in the desired section:Favorites section – to create a favorite view or a folder.
Global Views section – (Admins only) to create a global view or folder.
My Views section – to create a personal view.
In the Create a New View modal, select a template from the available options:
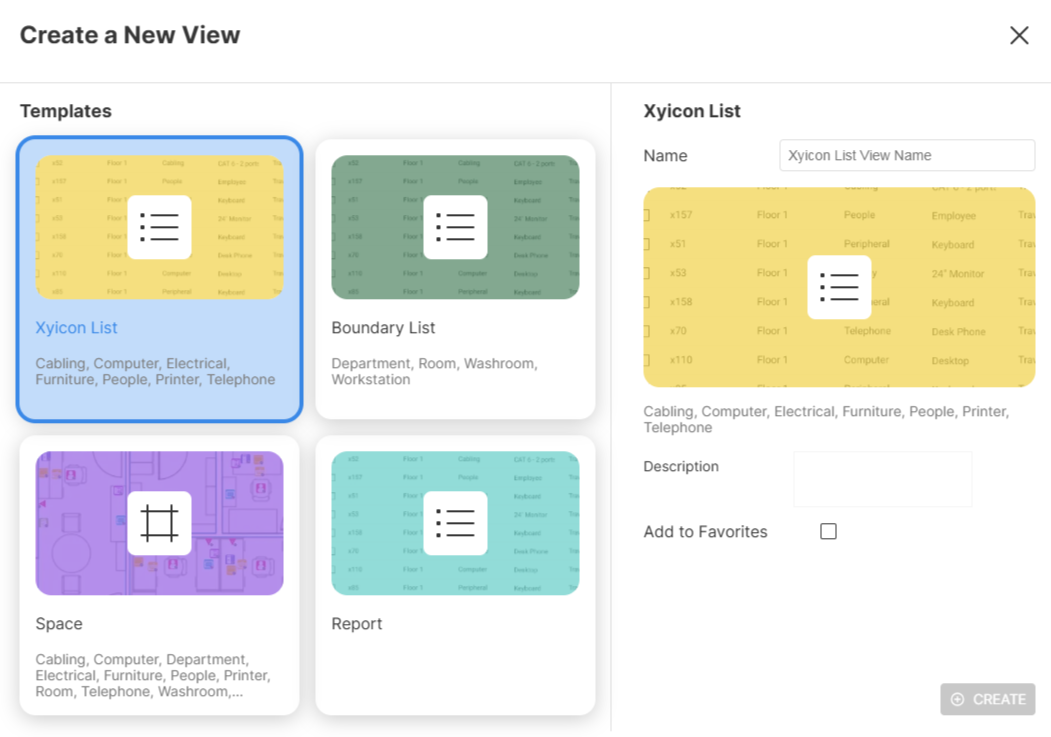
Xyicon View (selected by default) - Creates a list of all the xyicons included in the selected space.
Boundary View - Creates a list of all boundaries within the selected space.
Space View - Creates a view of the current workspace as an instance of the existing space.
Report View - Generates a report according to your needs based on the current workspace you are in.
Enter the relevant details and click Create. The newly created view will open as a tab.
NOTE: Step 4 is only applicable when creating Xyicon, Boundary and Space views. For instructions on how to create a Report View, see Creating a Report View.
Navigate to the desired module on the Main Menu or open the Space Editor.
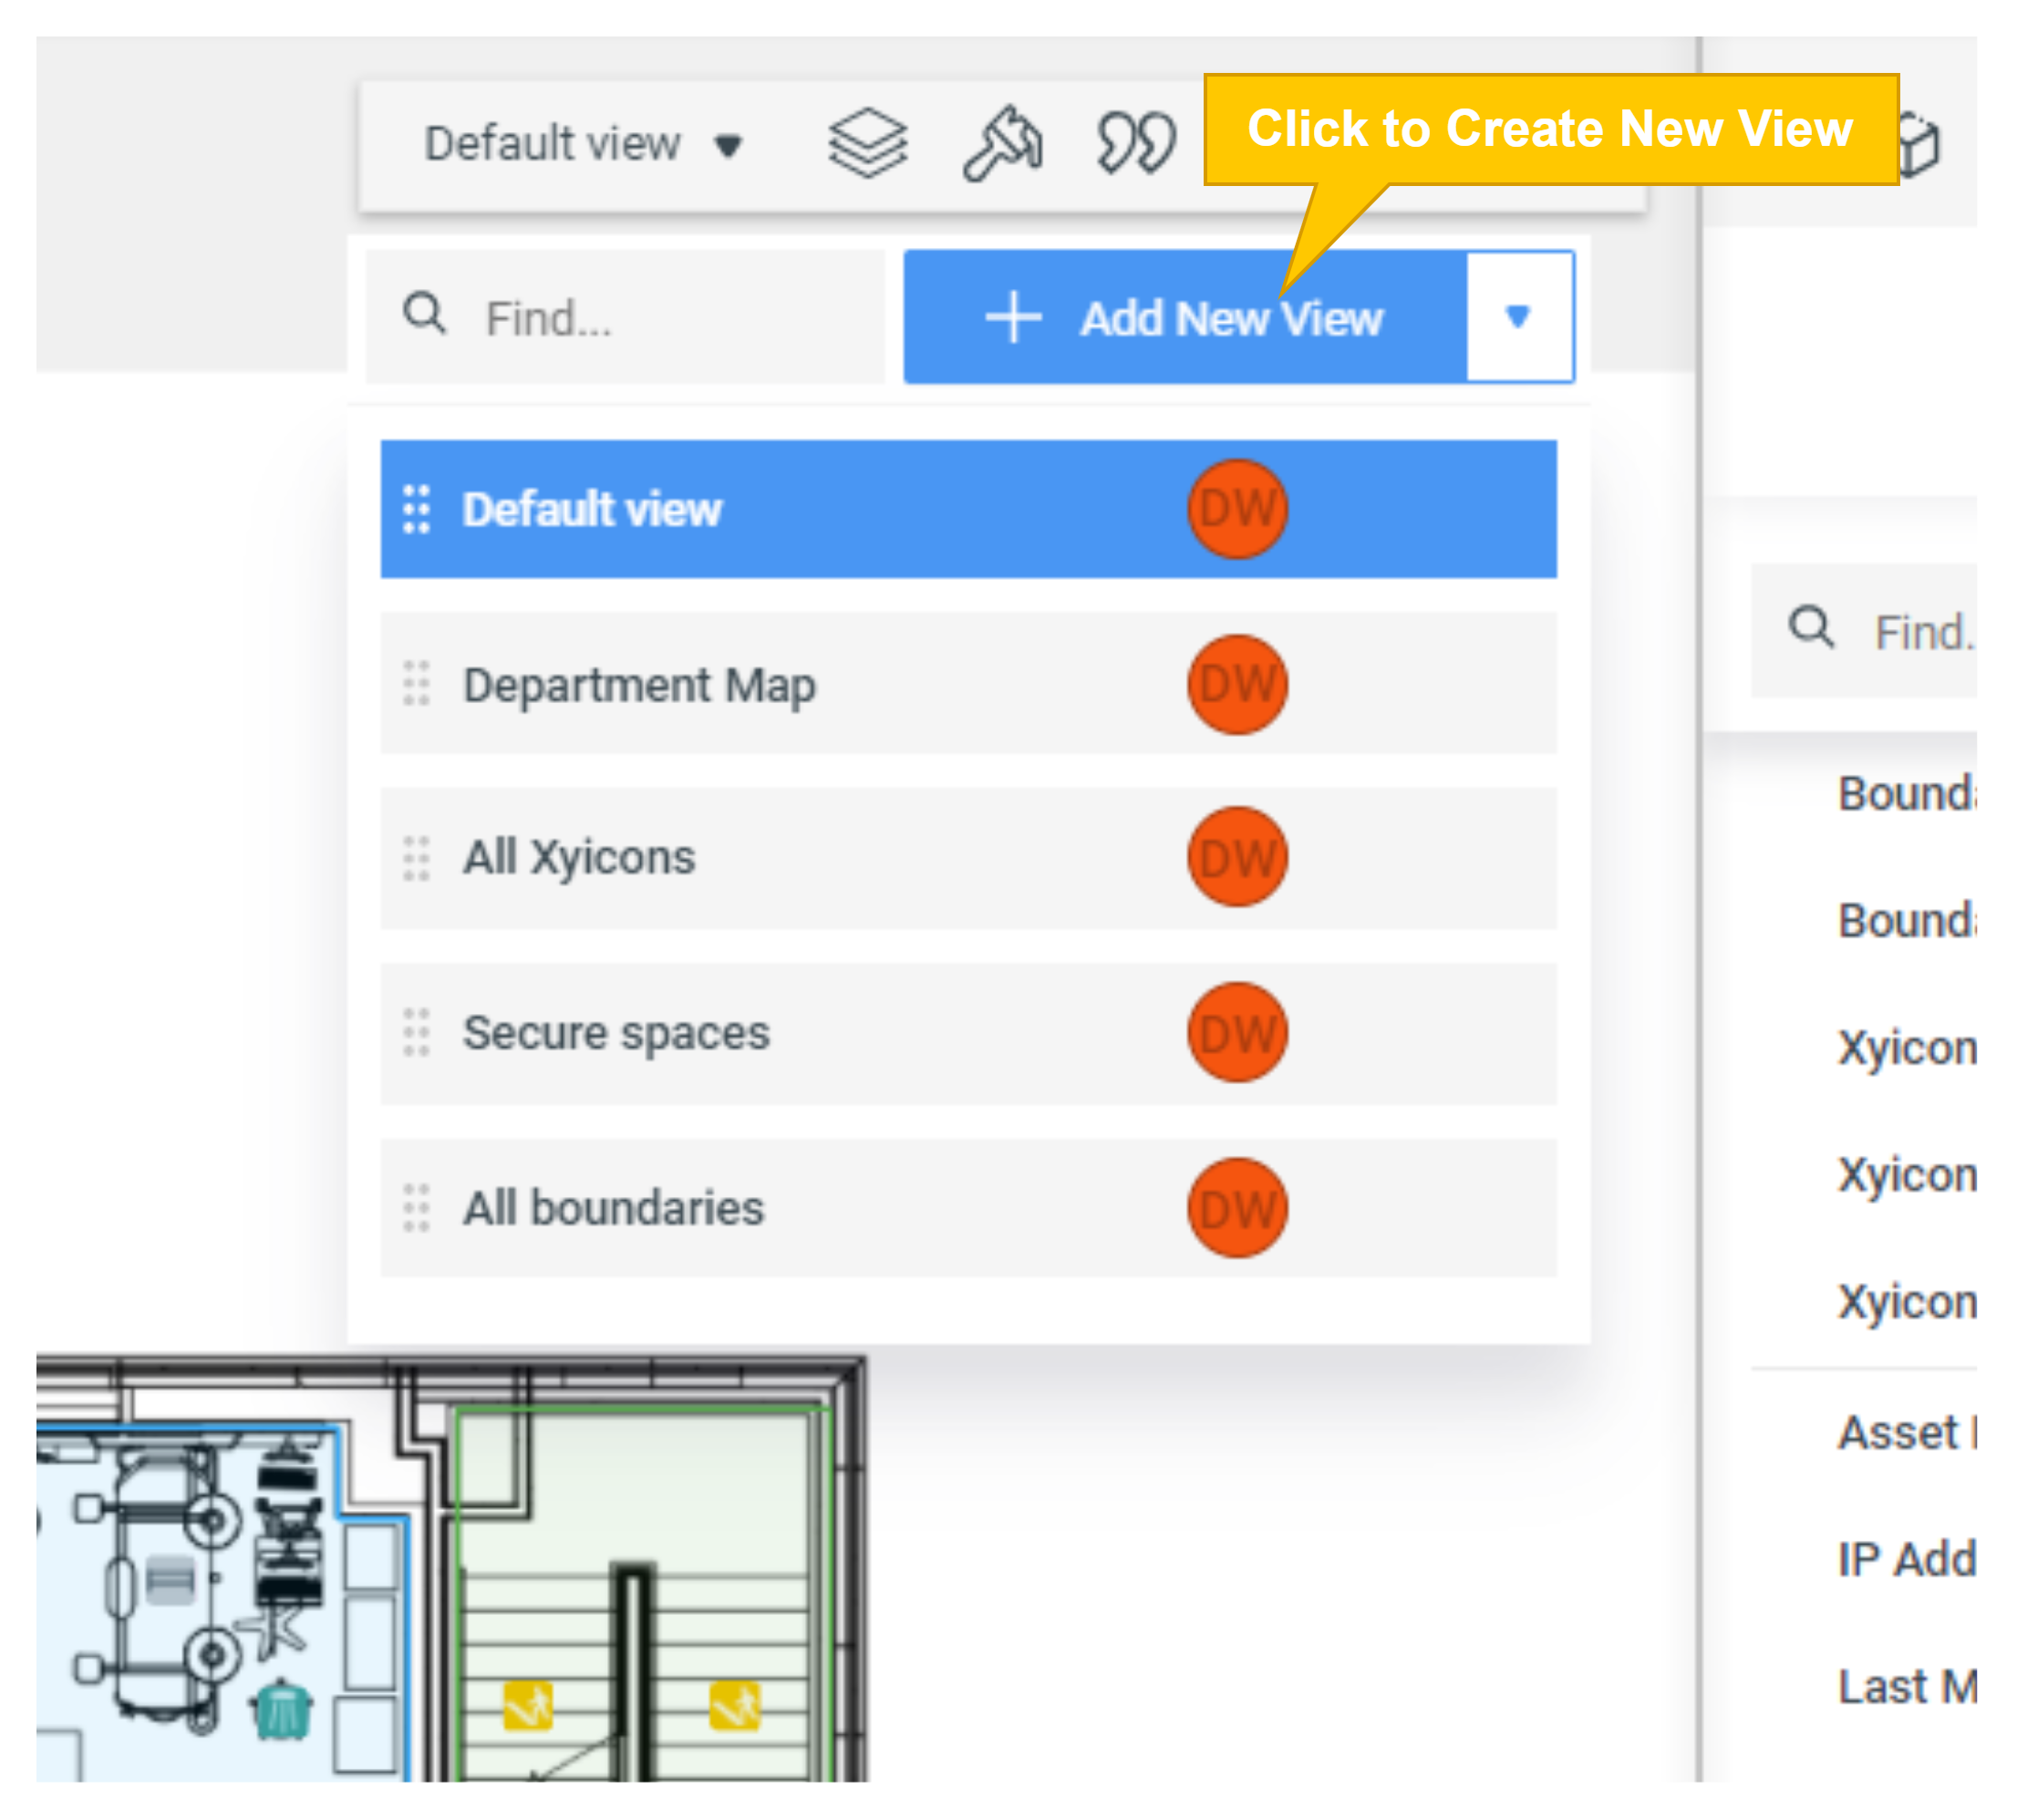
Click the View Selector field on the Views Bar of the module window.
To create a new view from scratch, click the Add New View button in the dropdown.
Type in the name of your view and press ENTER on your keyboard or click anywhere outside the field.
Once you have your view, you can
Set up layers, captions, and formats for a Space Editor view