Use this article to learn how to create a space in the SPACES module by uploading a new background file. To replace the background file of your existing space with a new file version, head over to the Replacing a Space article.
Before you begin
- Make sure you have set up the following module settings for the Space module under Xyicon Settings ( ): Space Types, Space Fields, and SpaceLayouts.
- Have your background file ready in
*.pdfformat. - Verify your Xyicon User has the necessary permissions to create a space.
Module Settings and User Permissions are managed by your organization's Xyicon Administrator.
Step 1 - Select a Version Set
All spaces require a version set. Depending on your requirement you can create a new version set or use an existing one.
Method 1 - Create a New Version Set
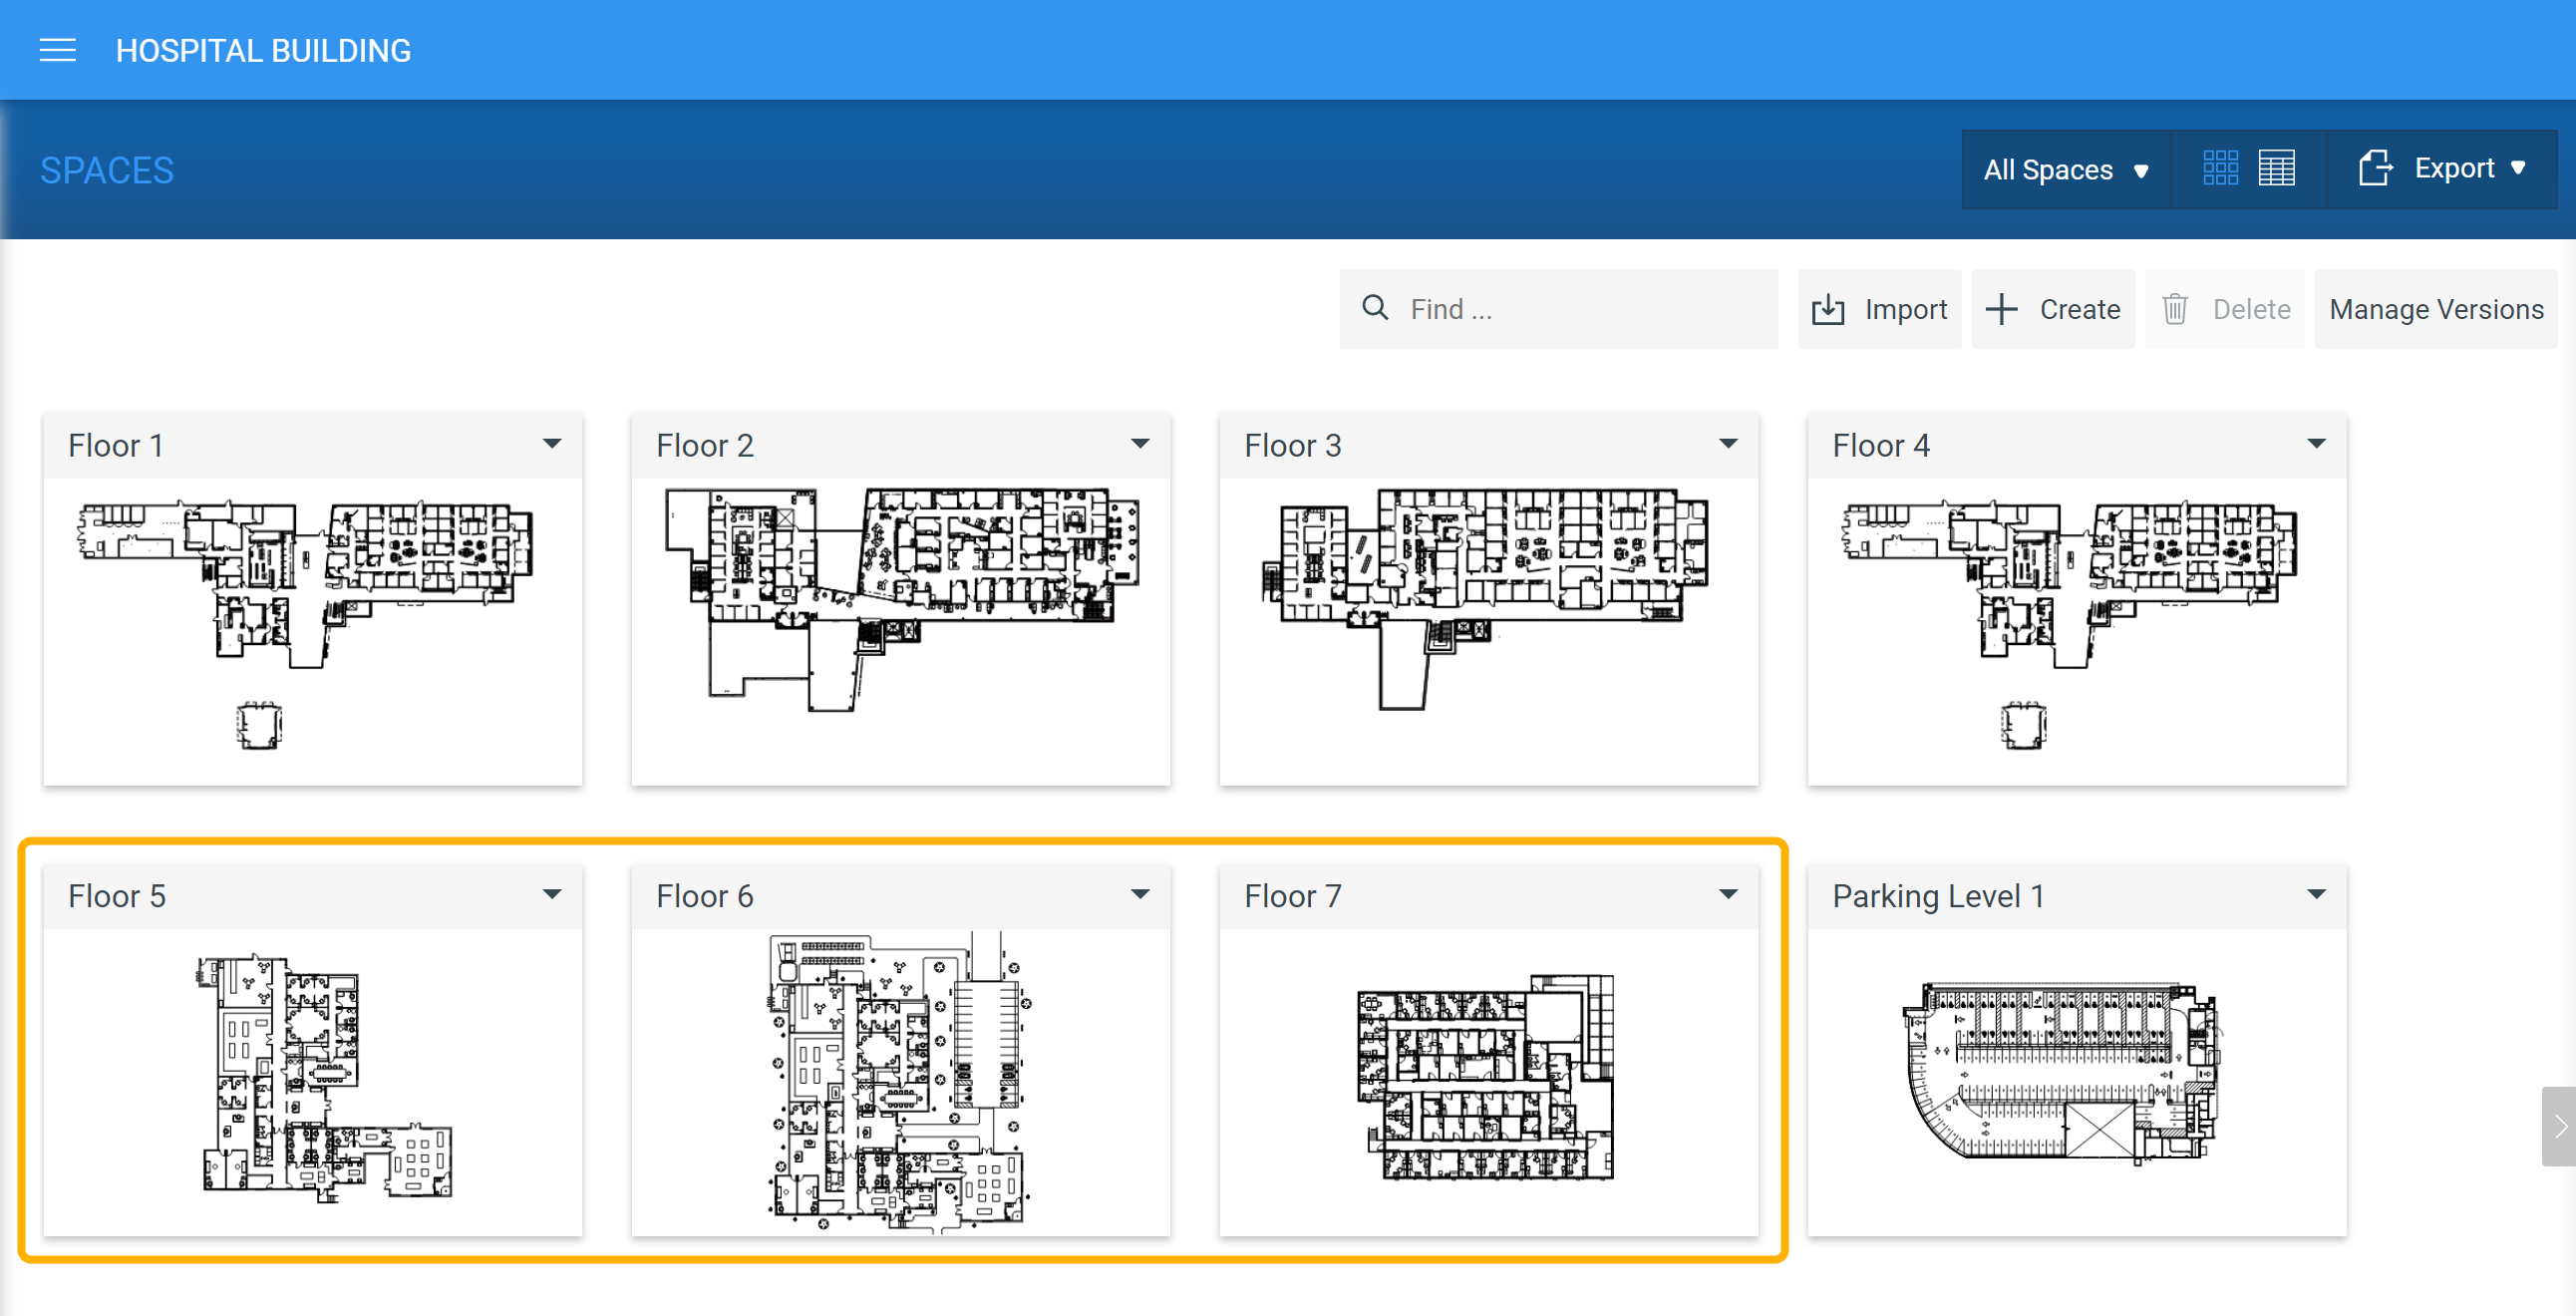
- Go to Main Menu ( ) > SPACES for your chosen portfolio.
- Click the Create button ( ) on the Action Bar.
- On the Create New Space panel that is displayed to the right, enter a unique name in the New Version Name field.
- Next, set the Issuance Date. The issuance date is usually the date the version of your background file was issued or released.
- Click Next to upload a background file.
Method 2 - Select from an Existing Version Set
- Go to Main Menu ( ) > SPACES for your chosen portfolio.
- Click the Create Space button ( ).
- On the Create New Space panel that is displayed to the right, select a version from the existing list.
- Click Next to upload a background file.
Step 2 - Upload PDF (Upload Background File)
A background file is a two-dimensional graphical representation of a space such as a floor plan, site map, image, drawing, illustration, or sketch. The background file serves as the backdrop on which you build your space (including object placement such as boundaries and xyicons). The file must be in *.pdf format.
- On the Create New Space > Upload PDF step, select the type of space you are uploading in the Space Type field.
- Click on the Upload File box ( ) and add the
*.pdffile you want. Alternatively, you can drag and drop your*.pdffile into the Upload File box as well. - To create multiple spaces at once, use one of the following methods when adding files to the Upload File box ( )
- Select a multi-page PDF file; Xyicon will separate them into individual background files.
- Select multiple PDF files
- Click Next to review your space names.
Step 3 - Review Space Names
- On the Create New Space > Review Space Names step, enter a unique name in the Space Name field for each of the listed background files.
- Make sure the correct version name is displayed in the Version History field.
- To rotate your background, click on the Options button ( ), and click Rotate 90° CW (clockwise) or Rotate 90° CCW (counter-clockwise).
- To delete a background file, click on the Options button ( ) and click Delete.
- Click Next to set up space scales.
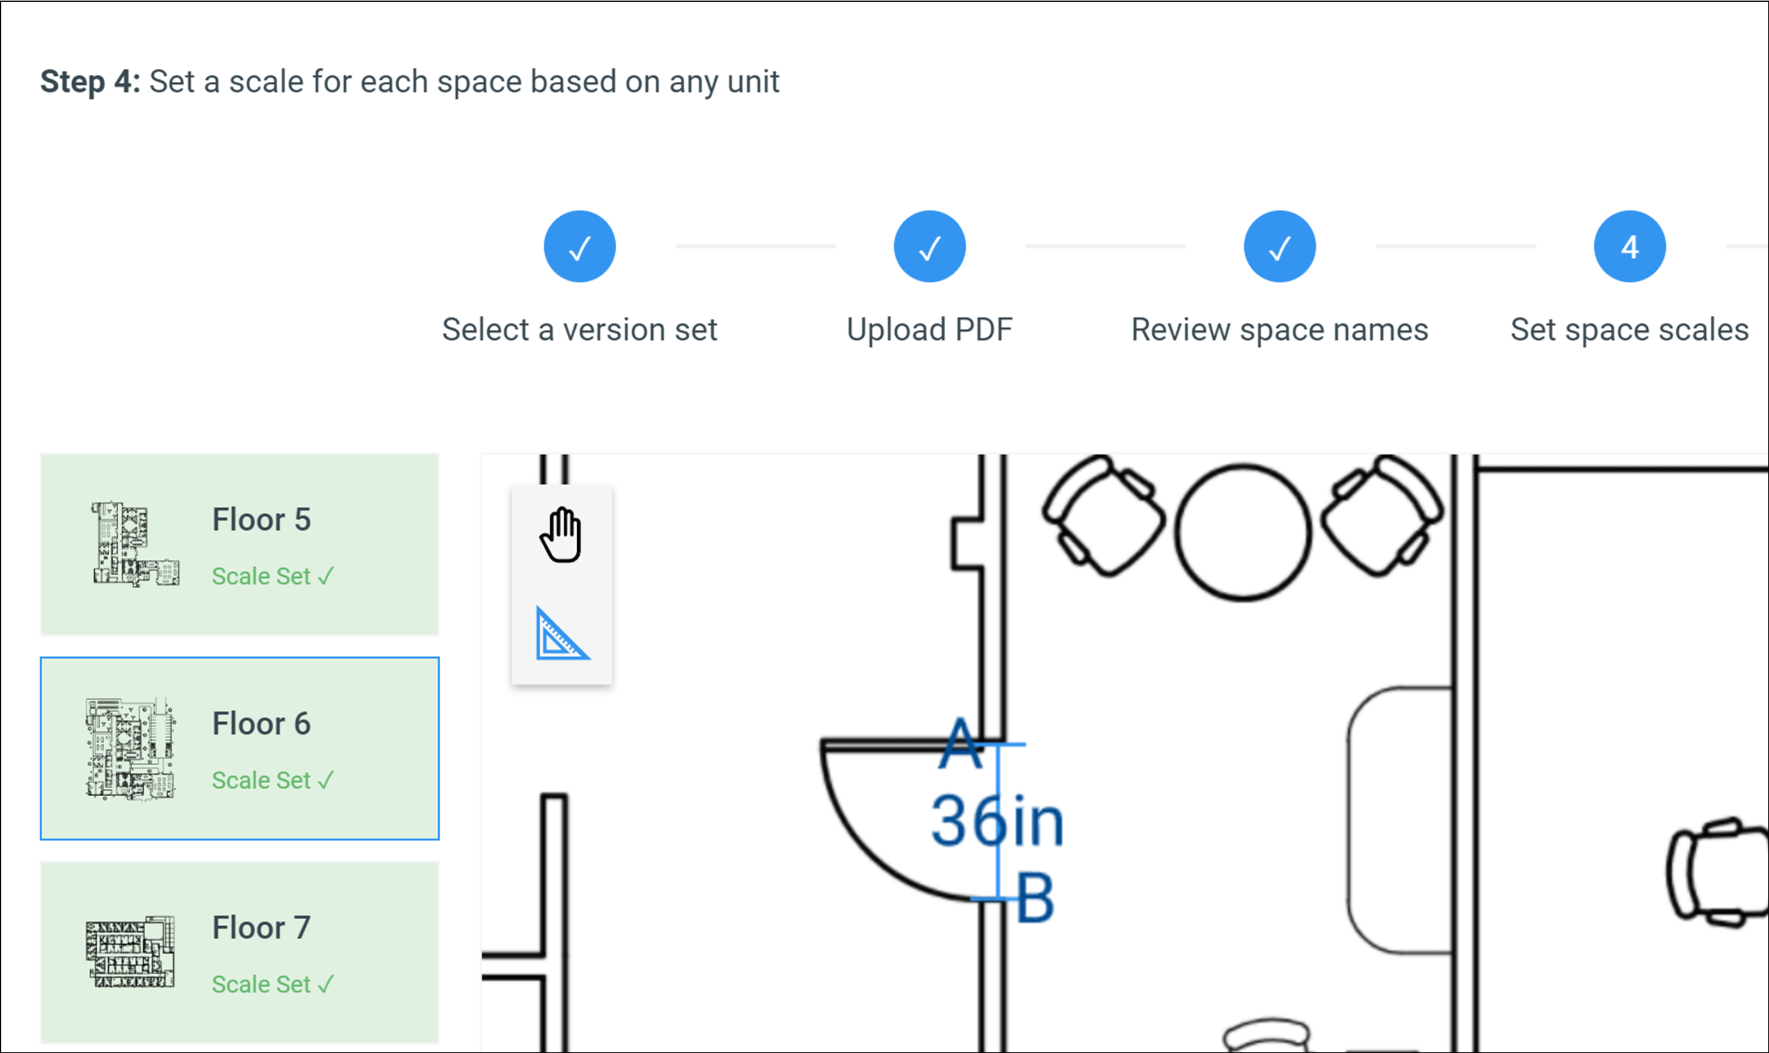
Step 4 - Set Space Scales
The scale of your space plays a critical role in how xyicons and boundaries are displayed, their proportions relative to the space, how they will plot, and how your space model will look in the Space Editor.
- On the Create New Space > Set Space Scales step, zoom in to your background file using the scroll wheel of your mouse (scroll up to zoom in and down to zoom out).
- Using the Pan Tool ( ) on the Alignment Toolbar, locate an area in your background file that you can use as a guide or reference point to set the scale. TIP: An example of a good reference point is a doorway, which generally has a standard measurement.
- Once you have a reference point, click the Set Scale button ( ) on the Alignment Toolbar. You will enter the drawing mode.TIP: Your cursor will change to a crosshair ( ) when you enter drawing mode.
- Align the cursor on one end of the reference point (point A), click and drag to draw a line to the other end of the reference point (point B), and release the mouse button to complete the action.
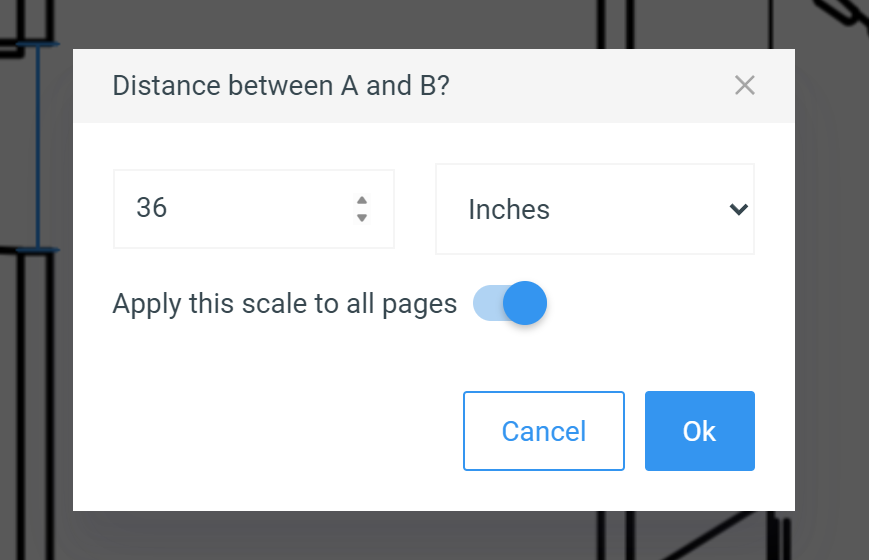
- Enter the distance between points A and B and select the correct measurement unit (e.g., Inches). Switch on the Apply this scale to all pages toggle button if the same scale can be applied to the rest of the background files.
- The space scales are set.
- Click Next to create your spaces.
Step 5 - Create Spaces
You are now ready to create your new space. Click Create. This activity may take a few minutes based on the number of background files you have uploaded. Once the process is complete, you can view your new spaces in the SPACES module.